

This month, I’m excited to share with you one of the most versatile features of Acumatica Cloud ERP: the ability to customize picklists. Picklists are lists of values used to populate dropdown menus in various screens throughout the system. Customizing picklists allows you to tailor Acumatica to your specific business needs and can help streamline data entry and improve accuracy.
In this article, we\’ll show you how to add new picklist values for Acumatica customization.
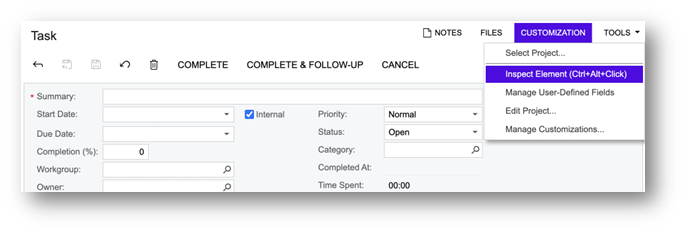
To get started, simply navigate to the screen with the picklist you want to update. Once there, click on Customization > Inspect Element and select the picklist you want to customize.
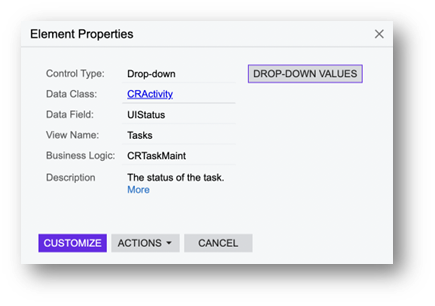
From here, click Customize and create a new project.
Once your new project is created, simply add the screen that contains the field and add the field into the project.
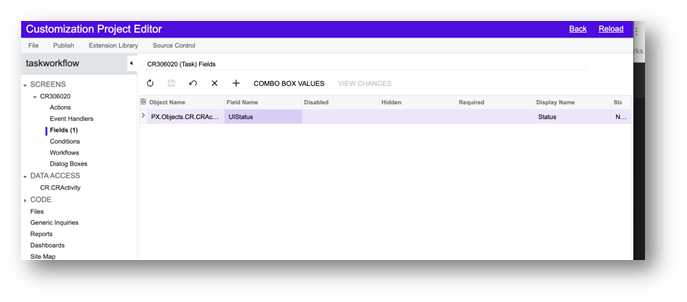
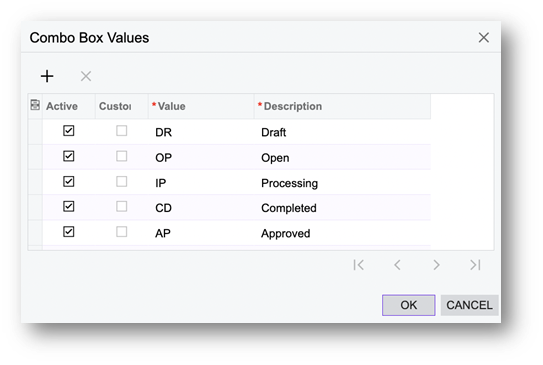
Finally, click Combo Box Values. Once there, you can add any additional picklist values you need.
Once you\’ve saved your changes, you can publish your project and use the new picklist field in Acumatica.
Customizing picklists in Acumatica Cloud ERP is a powerful way to personalize the system according to your business needs, and adding new picklist values is a key part of this process. By following these simple steps, you can easily add new values to picklists in Acumatica and improve the efficiency and accuracy of your data entry processes.
I hope you found this article helpful. Want to customize your Acumatica installation even more? Contact us to find out how Emerald TC can adjust your ERP for your unique business needs. For more tips and tricks on how to make the most out of Acumatica customization, stay tuned for my future articles!